You found ten upgrade ideas. Your cart looks brave. Your budget looks nervous.
The best Gaggia Classic Pro upgrade order starts with the problem you feel most often. Fix basics first, improve control next, then add workflow, comfort, and visual upgrades.
Quick decision rule
Buy the upgrade that solves your repeated daily pain. Do not buy the upgrade that only looks popular in someone else’s setup.
This is where many owners get stuck. The Gaggia Classic Pro has a huge mod ecosystem. PID kits, OPV springs, baskets, steam knobs, pressure gauges, wood panels, scales, screens, and workflow tools all look useful. Some are useful. Some are useful later. Some are just shiny little budget traps wearing a nice hat.
The goal is not to build the most modified machine. The goal is to build a machine that teaches you clearly and feels better every day.
Table of Contents
- Start with the pain point
- Step 1: fix the brewing basics
- Step 2: improve control
- Step 3: improve workflow
- Step 4: add comfort and visual upgrades
- Upgrade order map
- What European buyers should watch
- FAQ
Start with the pain point
A good upgrade order begins before the product page.
Ask one plain question first: what annoys you every week?
If the cup tastes good once and then disappears, your pain is repeatability. If grind changes do not make sense, your pain may still be foundation. If the coffee is fine but the routine feels clumsy, your pain is workflow. If the steam knob annoys you every morning, your pain is comfort.
Forum threads around Gaggia upgrades often show the same pattern. Owners are happiest when they can explain the reason for a part before they buy it. They are less happy when the first purchase comes from a random upgrade list. The machine becomes expensive, but the cup does not become clearer.
Use this first screen:
This is also why How to Choose Your First Gaggia Classic Pro Upgrade starts with symptoms, not products. Symptom-first buying keeps your upgrade path clean.
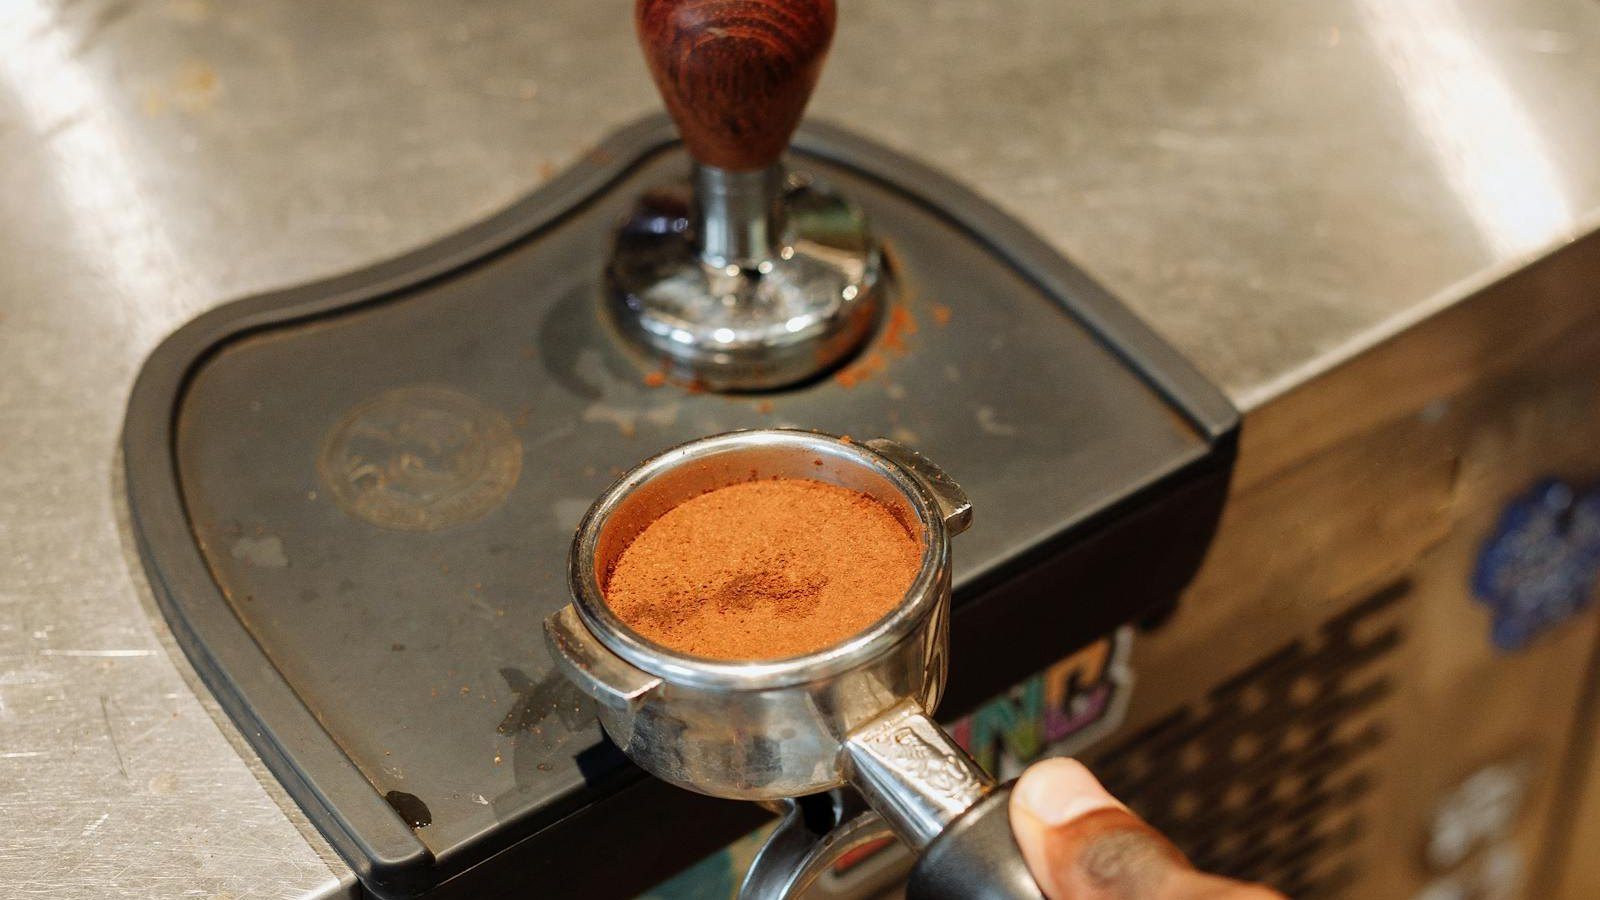
Step 1: fix the brewing basics
The first upgrade is sometimes not a machine mod.
If the grinder is weak, the machine cannot give clean feedback. If puck prep changes every shot, the machine cannot teach a clean lesson. If beans are stale or the warm-up routine changes daily, even a good mod can feel underwhelming.
This is the unglamorous part. It is also the part that saves money.
Before serious machine upgrades, check these basics:
If these pieces are still moving, machine mods may feel weaker than they really are. It is like trying to judge a new tire while the road is moving. Very exciting. Not very useful.
For a tighter daily routine, pair this step with the Gaggia Classic Pro First-Shot Checklist.
Step 2: improve control
Control upgrades should move up the list when the basics are already decent.
This is where PID control, pressure work, and repeatability upgrades become more interesting. They do not replace skill. They make your skill easier to read.
A PID is a strong example. If you can already make a good shot but cannot repeat it, temperature control can remove one large hidden variable. That makes grind changes easier to judge. It also makes roast-level temperature testing more useful.
Pressure-related changes belong in the same family. They should not be bought because the number sounds cool. They should be bought when the pressure behavior is part of the problem you are trying to solve.
Use this control test:
For the temperature side, read What a PID Controller Changes in Daily Brewing and Why Temperature Stability Matters on the Gaggia Classic Pro. Those two pages explain why control is often a workflow upgrade, not only an electronics upgrade.
Step 3: improve workflow
Workflow upgrades are best when the machine is already readable.
This category includes baskets, puck prep tools, a scale, reference cards, dosing aids, and small routine helpers. These upgrades may not sound dramatic. But they can make the daily process faster, cleaner, and easier to repeat.
The key is timing. A workflow tool works best when it supports a routine that already has a stable base. If the machine is still hard to read, a new accessory may only make the setup look more complete. It may not make decisions easier.
Here is the practical split:
Small tools are not inferior upgrades. They are just different upgrades. The article Why Small Accessory Upgrades Can Create Strong Value explains this path in more detail.
Step 4: add comfort and visual upgrades
Comfort upgrades matter when the pain is felt every day.
A steam knob can be a good upgrade if the stock feel annoys you often. A nicer handle can be worth it if you touch it every morning. Visual upgrades can also make the machine feel more personal. There is nothing wrong with that.
The mistake is buying comfort or visual parts while the machine still feels confusing in the cup. A beautiful machine that still sends mixed signals can disappoint. A readable machine makes later comfort upgrades feel more satisfying.
Use this order:
This is where restraint is your friend. The cart may whisper. Let it whisper.
Upgrade order map
This is the clean route for most owners.
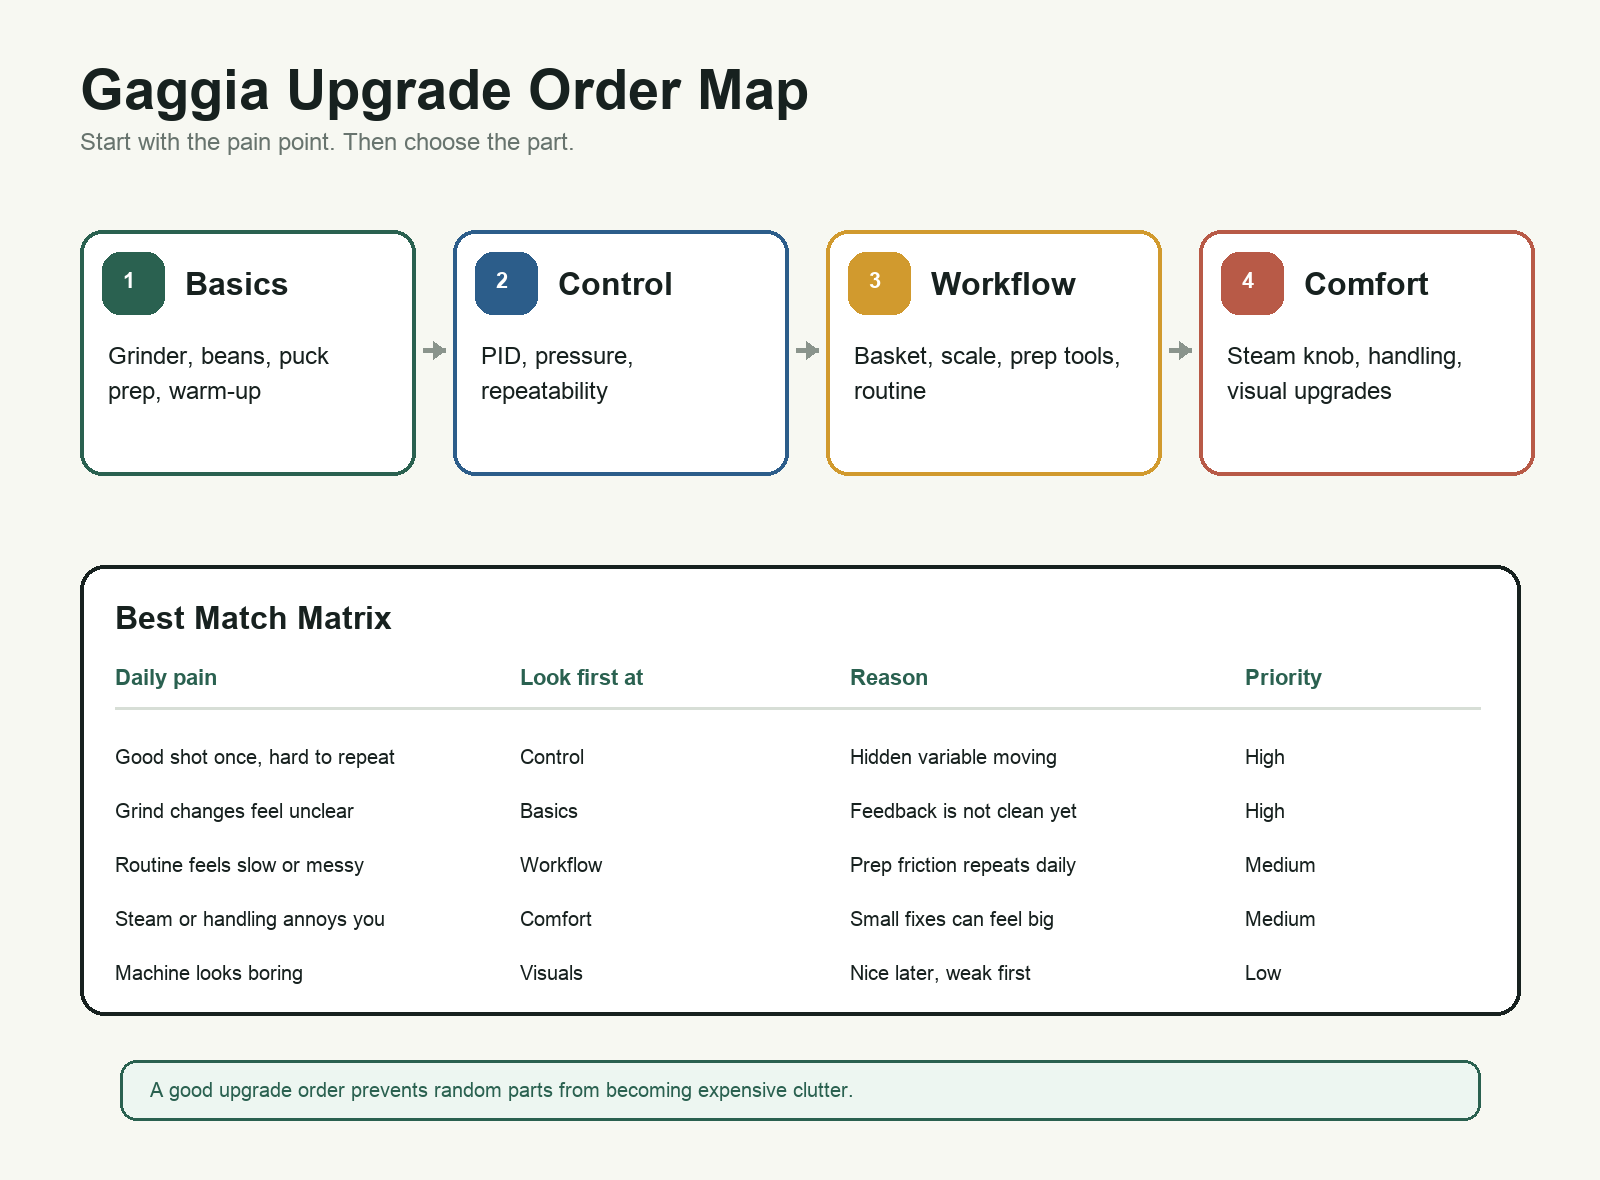
The order is not a law. It is a decision filter.
If the cup gives unclear feedback, do not start with visual parts. If the grinder hides every change, do not expect a machine mod to feel dramatic. If the machine is already readable, do not ignore workflow comfort. The right order changes with the pain point.
For many owners, the strongest practical path looks like this:
- Fix basics.
- Improve control if repeatability is still the problem.
- Add workflow tools that make prep easier to repeat.
- Add comfort parts that you feel every day.
- Add visual upgrades when the machine already works the way you want.
That path keeps each purchase tied to a real reason. It also makes later purchases easier to judge. The upgrade did not just arrive. It had a job.
What European buyers should watch
For buyers in Berlin, Milan, or Amsterdam, the order can also depend on shipping and support comfort.
A small accessory may be a better first purchase if you are still testing a brand from another country. A control kit may make more sense once you know your machine, your local voltage setup, and the kind of support you want. This is not only about price. It is about project risk.
Use this practical filter:
This keeps the article useful without forcing location into every paragraph. Geography matters when it changes delivery expectations, support comfort, or the size of the project you are willing to start.
FAQ
What is the best first Gaggia Classic Pro upgrade?
There is no single best first upgrade for everyone. The best first upgrade depends on whether your main problem is unclear feedback, unstable shots, workflow friction, or comfort.
Should I install a PID before accessories?
Install a PID first only when repeatability is the real issue and your basics are already stable. If the routine is clumsy but the cup is stable, accessories may come first.
Should I upgrade the grinder before the machine?
Often, yes. If grind changes are not clear or the grinder cannot make small adjustments, the grinder may matter more than machine mods.
Are visual upgrades a bad idea?
No. They are just usually later upgrades. Visual parts make more sense after the machine already works the way you want.
How do I avoid buying random parts?
Name the weekly pain first. Then buy the part that solves that pain. If you cannot name the problem, wait.
The best upgrade order is not the most expensive order. It is the order that makes the machine easier to understand, easier to use, and easier to enjoy.
References and image credit
- Reddit: representative Gaggia Classic Pro mods and upgrades discussion
- Coffee Forums UK: The Gaggia Classic PID Reference Thread
- Featured image: Pexels, used under the Pexels License