
Flair 58 mods: how do I get pro shots from a manual lever?
Pressure profiling by hand, thermal management, baskets and screens for the Flair 58 - the manual lever platform built for absolute control.
The Flair 58 is a full-manual lever espresso platform with a 58mm brew group, electric preheat, and absolute user-controlled pressure profiling. This guide covers thermal management, hand pressure technique, and the modification ecosystem.
Daily Flair 58 ownership comes down to three disciplines: managing 85-95°C electric preheat against cylinder thermal stratification, profiling 6-10 bar by hand through 2-3 bar pre-infusion and a declining finish, and matching a 58mm basket, puck screen, and telemetry setup to your roast. Get those right and this machine rivals commercial profiling gear costing several thousand dollars more. See the full Flair 58 line here.
Below are ten questions Flair 58 owners actually ask after honeymoon enthusiasm fades, then five quick answers for edge cases. Every spec comes from community testing plus my own bench time on these machines.
How do I profile pressure on a Flair 58?
The Flair 58 hands you absolute pressure control, which means you can replicate Slayer-style long pre-infusion at home without spending four figures. Start by pressing the lever until the gauge reads 2-3 bar, then hold and watch the bottomless portafilter. Wait 10-15 seconds for dark drops to uniformly cover the basket bottom. Water penetrates and swells coffee cells here, killing the physical conditions for channeling later in the high-pressure phase.
Once the puck is uniformly wet, ramp pressure to 7-9 bar over about 2 seconds. High-flow baskets with light roasts want 8-9 bar held steady to break cell walls and push EY% up. Dark roasts in low-flow baskets want 6-7 bar for a softer, less bitter cup. When beverage weight hits one-third of target, soluble flavor compounds are largely depleted and puck density drops, so taper force down to 4-5 bar following the accelerating flow. This decline mimics spring-lever machines and shuts down end-shot tannin extraction.
The Lance Hedrick video below walks the same curve on a Flair 58. Pair it with a Pressensor or BooKoo Bluetooth transducer plus Beanconqueror and you plot pressure, flow, weight, and time on one chart. That turns a subjective sensory device into an objective R&D platform. Browse Bluetooth pressure sensors in the shop.
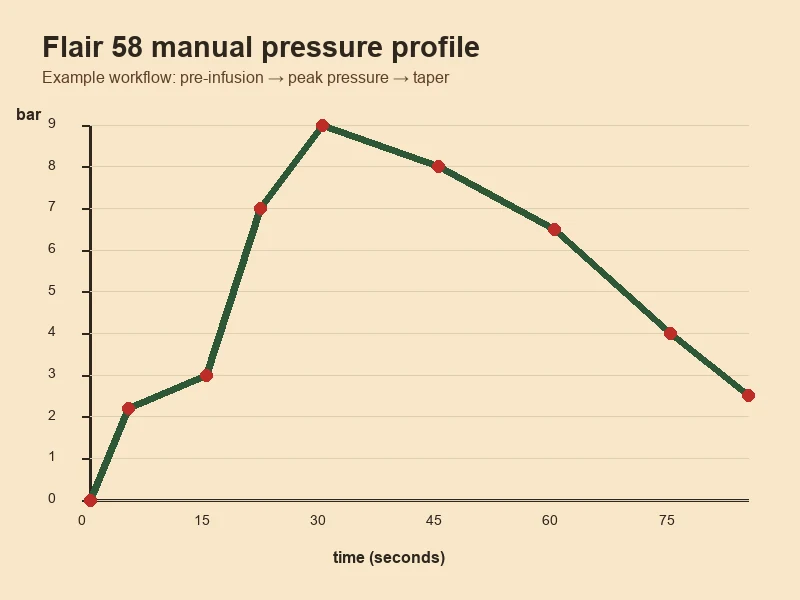
Key takeaway: Hold 2-3 bar for pre-infusion, ramp to 7-9 bar, then taper to 4-5 bar as flow accelerates. Read the gauge and the bottomless portafilter together.
Do I need the thermal sleeve for the brew head?
The factory preheat element sits in the upper-middle of the brew chamber, so heat concentrates at the top while the bottom (closest to the puck) runs far cooler. James Hoffmann and Lance Hedrick both documented this stratification. Brew immediately after the beep and water hitting the puck can be only 87-88°C, which is fine for dark roasts but disastrous for light roasts - sharp acidity, grassy notes, severe underextraction.
A thermal sleeve helps, but it does not fix stratification alone. Three schools of thought dominate the community. The static heat-bank method preheats on High with the lever raised, pours near-boiling water, then waits 3-5 minutes for heat to conduct downward; chamber stabilizes at 92-97°C. The declining temperature profile cuts the heater or uses Low, pours boiling water, and brews immediately so the natural decline on the back end reduces tannin extraction. The IoT route uses a Switchbot smart plug on High 20-30 minutes before the planned brew, saturating the metal basket and frame so thermal mass absorbs the pour-time drop.
My take: sleeve plus smart plug is the practical combo for daily drivers. Solo sleevework shaves edge losses but cannot beat a deep heat soak.
Key takeaway: A thermal sleeve reduces edge losses, but a 20-30 minute smart-plug heat soak on High is what actually kills thermal stratification.
Which basket works best for light roasts?
The basket is the primary physical and chemical interface between machine and coffee. Because the Flair 58 uses the standard 58mm size, you are not bound to factory accessories, but you must understand each basket's fluid dynamics to match roast level and grinder performance. Light roasts want high-flow or high-uniformity baskets.
| Basket Type | Structure & Hole Design | Fluid Dynamics & Tolerance | Recommended Roast & Flavor |
|---|---|---|---|
| Low-Flow Basket | Chamfered edges, small open area | Adds inherent backpressure; very forgiving. Reaches 9 bar without ultra-fine grind | Medium-dark roast; thick, high-body, traditional espresso |
| High-Flow Basket | Vertical walls, holes extend to the edge | Eliminates basket backpressure; resistance depends entirely on the puck. Channels easily; requires a top-tier grinder with ultra-fine uniform grind | Medium-light roast; even extraction across the bed, high EY%, clean bright flavor |
| High Uniformity Basket | Precision manufacturing, up to 1800 holes, 0.22mm hole diameter | Extreme high flow; 37% more effective open area than low-flow. Tiny holes block fines | Ultra-light high-aroma beans; releases floral/fruit notes, eliminates earthy off-notes from dark roasts; silky clean texture |
High-uniformity baskets demand a real espresso grinder. Drop one into a Flair 58 with a mediocre conical burr and you will channel every shot. See compatible 58mm baskets in the shop.
Key takeaway: Light roasts want a high-flow or high-uniformity basket paired with a top-tier grinder. Low-flow chamfered baskets belong on medium-dark roasts.
Why is my cylinder wall getting scored?
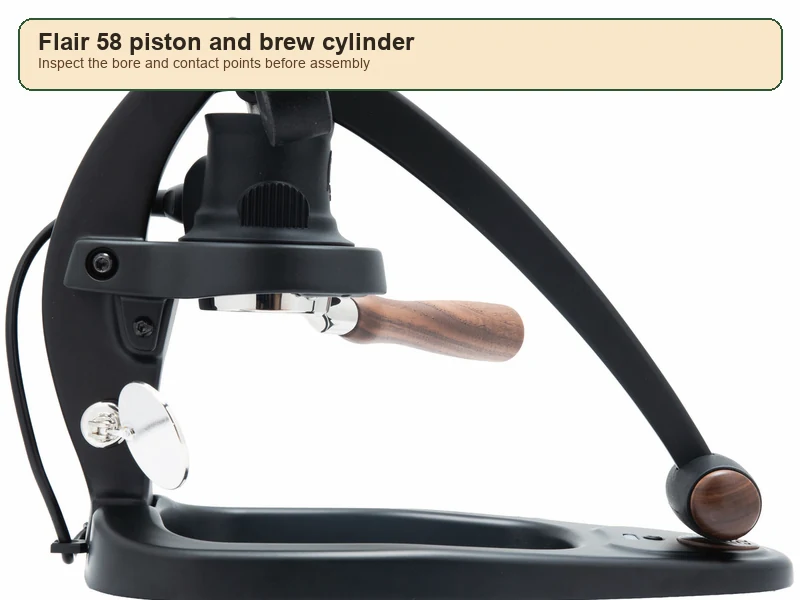
After months of high-frequency use, vertical scoring appears on the front and back of the cylinder inner wall, with matching piston wear. This is mechanical, not a quality defect. Fluid sealing design uses an L/D ratio (guide length to guided-element diameter); standard guides recommend L/D ≥ 1, ideally > 1.5. The Flair 58's 58mm piston with very short O-ring spacing falls well below this threshold. The hinged lever applies non-vertical force, producing side thrust - "piston slap" in IC-engine terms. Hard O-rings deform under 6-10 bar, letting piston metal contact the cylinder wall and producing symmetric front-back scoring. Hinge clicking is side-thrust release at the dry pivot pin.
Engineering verdict: cosmetic wear. Espresso peaks below 10 bar (~145 PSI), far below industrial hydraulic cylinders. Surface imperfections are compensated by O-ring elastic deformation; liquid sealing is unaffected. Shimming the base for "perfect centering" rarely works because the lever's arc trajectory means side thrust cannot be eliminated. Practical fix: periodically apply food-grade synthetic silicone grease (Dow Corning Molykote 111) to the O-rings and hinge pivots. Full Flair fault diagnosis flowchart here.
Key takeaway: Front-back cylinder scoring is cosmetic piston slap from short O-ring spacing. Grease O-rings and pivots with Molykote 111; do not chase perfect centering.
How do I stop the plunger from disconnecting?
The valve plunger system lets you pour water directly over the plunger for consecutive shots. Lifting the lever opens the internal check valve and water flows in; pressing closes it to build pressure. After multiple high-pressure shots, tiny eddies and axial friction rotate the plunger horizontally. The plunger top has two locking notches that should avoid the stem's locking tabs, but at certain angles they align. Pulling the lever then disconnects the stem from the plunger, interrupting your workflow with splashing hot water and hard-to-realign hot metal parts.
Flair's official fix is a plastic Plunger Key that inserts into the notches to rotate the plunger back to the safe 8-o'clock and 2-o'clock neutral position. The 3D-printing community responded with open-source longer-arm Plunger Alignment Tools on Printables and Thingiverse that reset the plunger without burning fingers. Print one in PETG, never PLA, and keep it next to the machine. Reset the plunger after every shot during cleanup, not when something goes wrong.
Key takeaway: Reset the plunger to neutral after every shot with a Plunger Key or a 3D-printed alignment tool. Do not wait for a disconnect to remind you.
What's the best preheat workflow for light roasts?
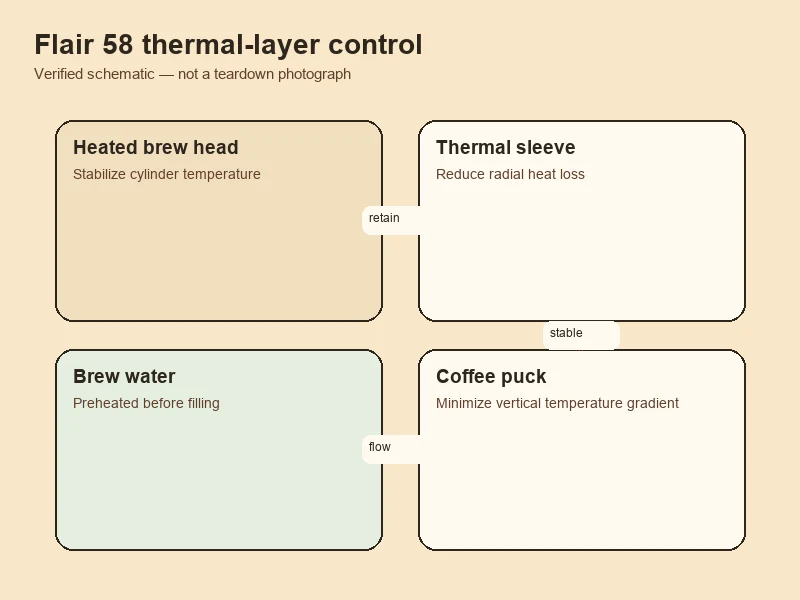
Light roasts punish lazy preheat. Start with a Switchbot smart plug scheduled to turn the Flair 58 on at High (95°C) 20-30 minutes before the planned brew. During preheat, lock the empty portafilter into the brew head and pull the lever fully up. The piston rises toward the heating element; the locked portafilter seals the bottom, forming a closed mini-oven that heats the cylinder bottom and the heavy metal basket. This is the most critical counter to system heat loss.
Do not equate gooseneck kettle temperature with your target brew temperature. The brew chamber always absorbs heat on pour. Even after long preheat, set the kettle to 98-100°C near boiling. Pour just-boiled water directly onto the plunger top opening until water fills the metal groove with no air bubbles. Slowly and steadily raise the lever so the check valve draws water into the brew chamber; too fast creates negative pressure that disrupts the puck. When the lever reaches the top, top up water in the notches to fully bleed air. Residual air is highly compressible and produces a spongy feel that makes pressure control impossible.
Key takeaway: Smart plug on High for 20-30 minutes, lever up with portafilter locked, kettle at 98-100°C. Bleed all air through the plunger notches before pressing.
Can I add PID temperature control to a Flair 58?
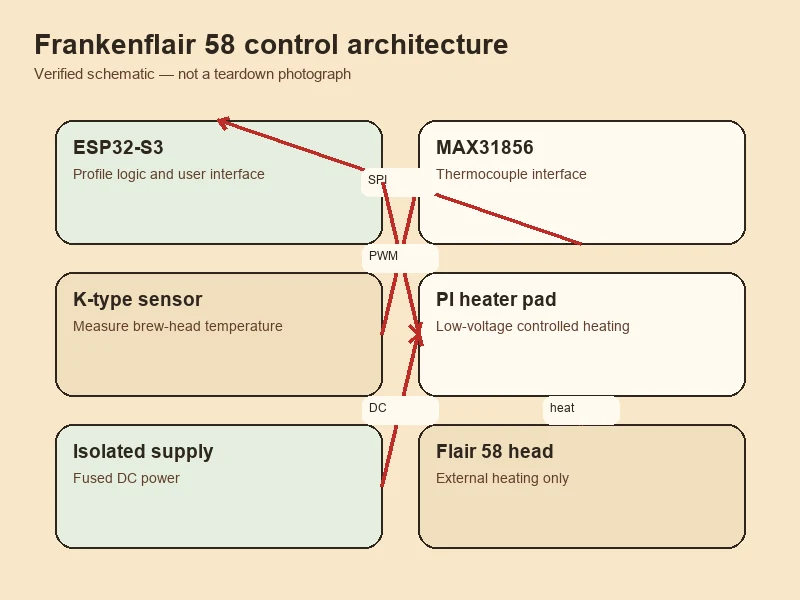
Yes, and the open-source community already did it. Frankenflair 58 is the hardcore project. An engineer rebuilt the machine around an ESP32S3 microcontroller (Seeedstudio XIAO) hidden in the base cavity. A micro thermocouple plus MAX31856 ADC inside the brew cylinder enables a precise PID closed-loop temperature algorithm that dynamically adjusts heating to water volume and ambient temperature, solving the stock unit's wild temperature swings. The mechanical pressure gauge is replaced by an industrial Sensata PTE7300 I2C pressure sensor; a 240x240 round capacitive TFT touchscreen (GC9A01 driver) sits on top. The dual-core MCU renders pressure and temperature curves at roughly 5ms refresh, with native Wi-Fi and Bluetooth-scale support. The stock 24V industrial power brick is replaced by a USB-C PD decoy chip, so a 100W GaN laptop charger fully powers the digitalized lever machine.
For non-electric versions (early Flair 58x or Flair 49 Pro), a low-cost Heating Mod is popular: a 24V/30W polyimide (PI) flexible heater (~45x100mm) wrapped on the cylinder with high-temp silicone or Kapton tape, paired with a cheap temperature-controller module with display. Under $50 total, performance rivals the official 58-series electric preheat. See Flair 58 mod parts in the shop.
Key takeaway: Frankenflair 58 adds ESP32S3, MAX31856 PID, and a Sensata PTE7300 pressure sensor. For non-electric Flairs, a $50 polyimide heater mod matches stock preheat performance.
Which puck screen actually improves the shot?
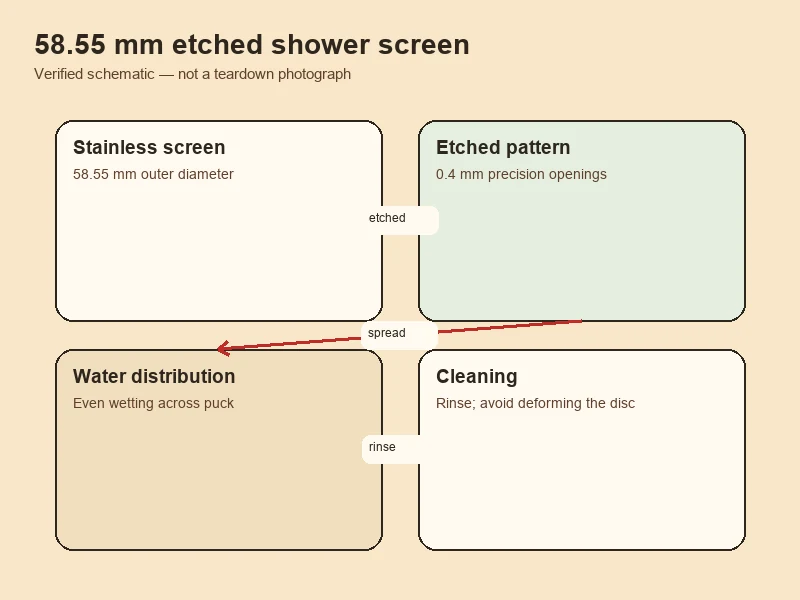
In the Flair's asymmetric press structure, the puck screen does real work: keeping the puck flat, preventing channeling, and blocking fines from jamming the plunger's check valve. The stock sintered mesh is thick with a complex pore structure. It traps grounds, and its large thermal mass absorbs heat from the puck on contact, destabilizing brew temperature.
The current flagship upgrade is the etched puck screen. Typically magnetic 304 stainless (martensitic) with a black PVD coating. Specs: 58.55mm diameter for a perfect basket fit, 0.5mm thickness, 0.4mm laser-etched straight holes. Minimal thermal mass preheats in milliseconds on hot-water contact, eliminating the pre-wetting step. Straight holes do not trap fines, so it rinses clean. The magnetic property lets you lift the screen off the hot puck with the back of the magnetic shot mirror, a meaningful workflow gain for back-to-back shots.
Skip sintered. Skip cheap clones with etched-in logos that trap coffee oils. A real etched 58.55mm screen is a $20-30 part that pays back every shot.
Key takeaway: An etched 58.55mm, 0.5mm, 0.4mm-hole magnetic puck screen beats the stock sintered mesh on thermal mass, fines handling, and workflow.
How do I descale the Flair 58 safely?
Conventional wisdom says manual machines have no internal boiler, water stays only seconds in the chamber, and descaling is unnecessary. The Flair 58's electric heating breaks this assumption. Users on tap or medium-hardness water find white mineral scale on the cylinder walls and piston top within days. After extraction, when excess water is pressed out, the metal chamber remains above 90°C. The thin water film on the walls flash-evaporates; calcium carbonate and magnesium carbonate bake onto the metal. Over time, scale increases O-ring friction and makes the press jerky.
Anti-scale strategy: avoid hard water entirely. Use distilled or RO water with added espresso mineral formulations (Third Wave Water or the rpavlis potassium bicarbonate recipe - these do not scale and protect the metal). For stubborn scale, soak the brew chamber with 1:1 white vinegar/water or 5-10% citric acid for 10-30 minutes. Quarterly soaks are enough for most users.
Key takeaway: Run distilled or RO water with Third Wave Water or rpavlis minerals to prevent scale. Soak the cylinder in 1:1 vinegar or 5-10% citric acid quarterly if scale appears.
Is the Flair 58 Plus 2 worth the upgrade?
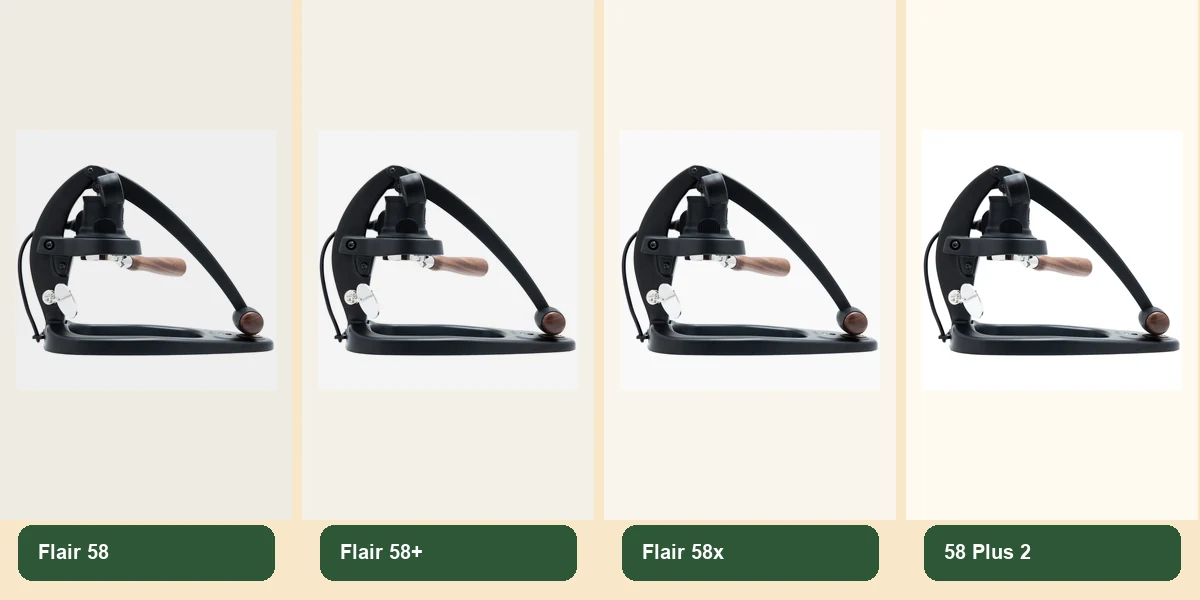
Depends on what you are coming from. The product line evolved through four generations, and the Plus 2 fixes the cable-clutter problem that plagued every earlier revision.
| Model | Power & Preheat Architecture | Brew Head Electrical Connection | Standard Accessories & Integration | Market Position & Milestone |
|---|---|---|---|---|
| Original Flair 58 / 58x | External wired control box, suspended design, large power brick | Hardwired (non-detachable); extreme moisture caution during cleaning | Standard low-flow chamfered basket, basic dispersion screen | Established the 58mm standard, introduced three-stage electric preheat; cable management was messy |
| 2023 Revised Flair 58 | External wired control box, suspended design, large power brick | Quick-disconnect (Detachable Preheat Cable) | High-flow straight-wall basket option, optimized internal wiring | Resolved shock and water-ingress risks during cleaning; supports off-grid boiling-water preheat |
| Flair 58+ (Plus) | External wired control box, suspended design, large power brick | Quick-disconnect | Walnut wood custom components, high/low-flow dual baskets, articulated magnetic shot mirror | Elevated luxury, improved wooden-grip ergonomics, completed factory accessory ecosystem |
| Flair 58 Plus 2 | Base-integrated thermal control module, new compact power adapter | Quick-disconnect | Inherits full 58+ accessory ecosystem; optional dedicated travel case | Resolved desktop cable clutter; the most integrated and industrially refined flagship |
If you own an original 58 or 58x with the hardwired head, the 2023 revision's quick-disconnect cable alone justifies the swap on safety grounds. If you own a 58+, the Plus 2 is a desktop-aesthetics upgrade, not a brewing upgrade - the brew head and preheat performance are functionally identical. Compare all Flair 58 models here.
Key takeaway: Upgrade from the original 58/58x for the quick-disconnect cable. Skip the Plus 2 if you already own a 58+; the brewing platform is the same.
Quick answers for edge cases
Can I use boiling water preheat instead of the electric element?
Yes. Off-grid or backup workflow: preheat the brew head by pouring boiling water, letting it sit 30-60 seconds, dumping, and repeating 2-3 times. You lose the three-stage temperature control but the 2023 revision and later explicitly support this. Pair with a thermal sleeve to slow edge losses.
What's the best grinder for a Flair 58?
Flat-burr espresso grinders in the cafe tier. With high-flow or high-uniformity baskets you need ultra-fine uniform grind that cheap conicals cannot produce. A mediocre grinder channels every shot through a high-uniformity basket. Spend grinder money before basket money.
How do I know if my cylinder needs replacing?
It almost never does. Front-back scoring is cosmetic and O-ring elastic deformation compensates. Replace the O-rings if the press feels jerky or if water weeps past the piston under pressure. Replace the cylinder only if you see cracks or deep pitting beyond the surface finish.
Can I travel with the Flair 58 Plus 2?
Yes, with the optional dedicated travel case. The Plus 2's base-integrated thermal module and compact power adapter were designed for this. The older 58+ with external control box and power brick is awkward to pack; if you fly with a Flair regularly, the Plus 2 is the model to own.
How do I know if my pressure gauge is accurate?
Cross-check with a Bluetooth transducer on a G1/8 thread adapter. Pressensor and BooKoo Espresso Monitor read to 0.01 bar against the mechanical needle. If the mechanical gauge reads more than 0.5 bar off the transducer at 9 bar, replace the gauge or calibrate it. A drifting gauge silently ruins your profiling.
Ready to mod your Flair 58?
Got a question this guide did not answer? Talk to us and we will walk through your setup.
Pick your first mod.
Not sure where to start? Talk to us about your machine and your shots - we'll point you at the mod that actually fixes your problem.
 English
  Italiano
  Deutsch
  Español
  Français
  العربية
  日本語
日本語  한국어
한국어  香港中文
香港中文  Nederlands
  Português